Wednesday, January 26, 2011

My Little Shoe Box

I just love the bright fun cheerful papers that My Little Shoebox has brought out...

I have had the pleasure of work with the SIMPLE LIFE COLLECTION...great for farm or animal photo's

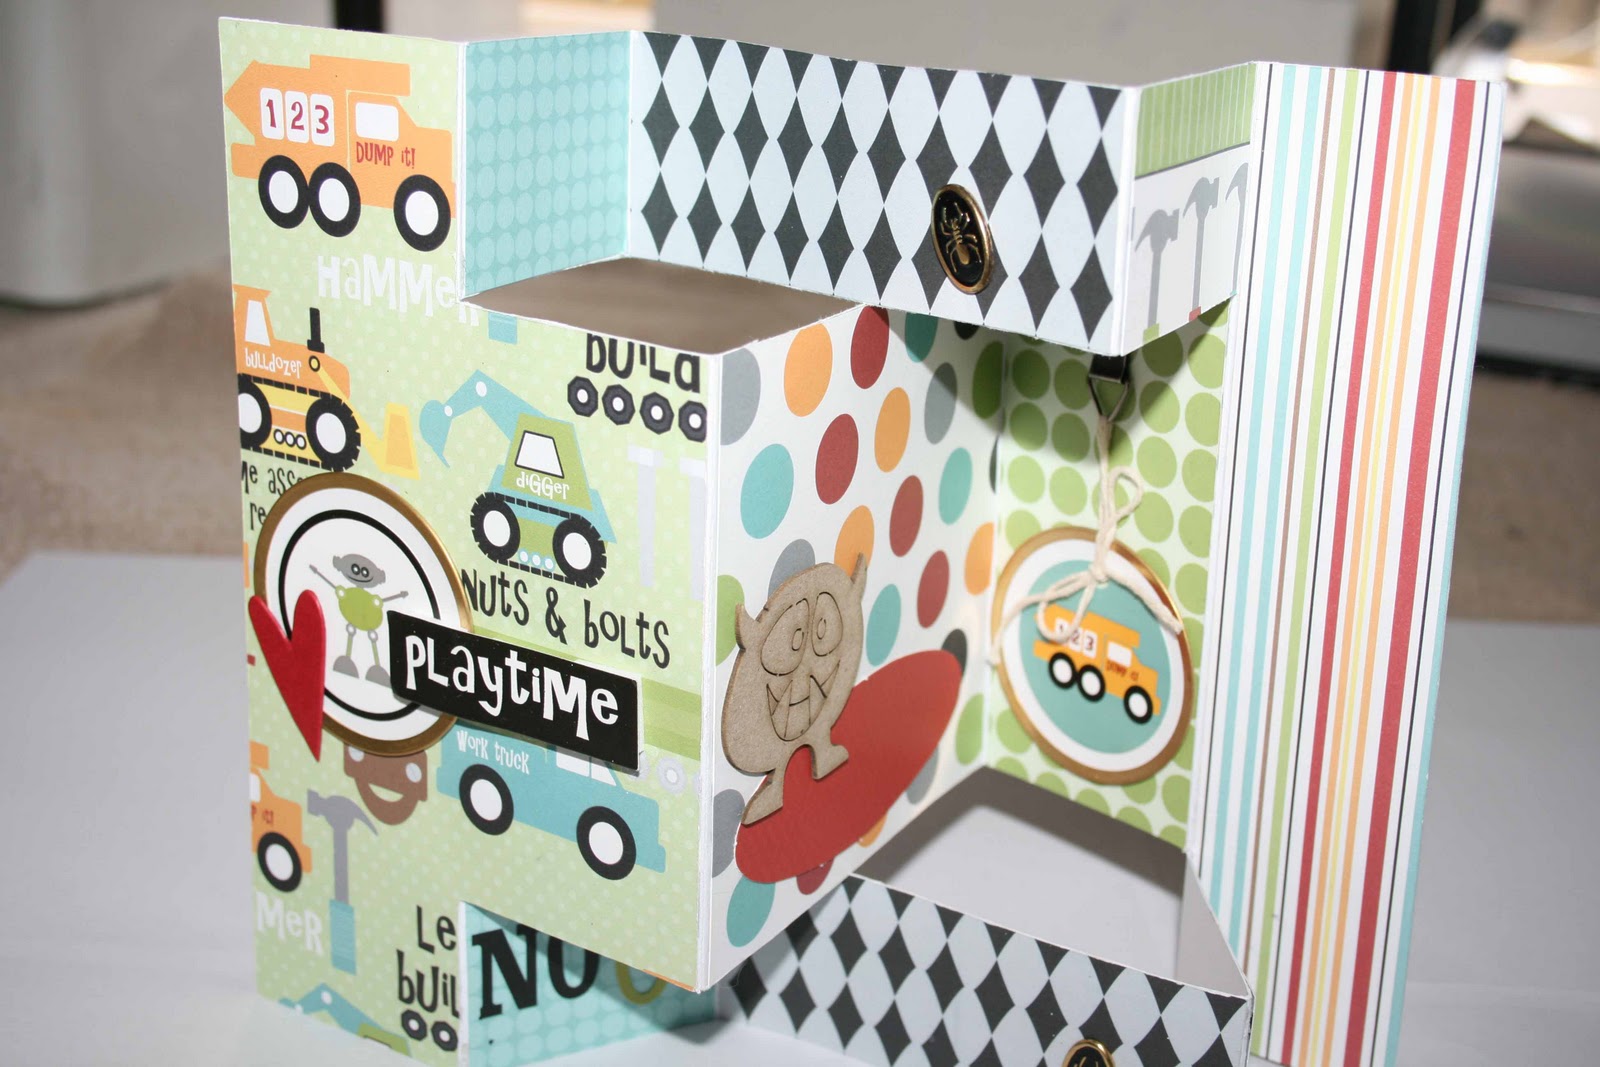
The above is a double Layout I had too many photos to do a single layout once again I have 3D some of the shapes to make them look as if the are popping out of the page.


A Close up of some of the 3D shapes...along with the banners...The Stickers are from the Bella Bvld Hello Beautiful Collection


These papers are fun to work with it's amazing what you can do cutting out the shapes and just adding something as simple as 3D foam...

There are lots of different products to this collection which can be viewed here
http://www.bumblebeecrafts.com.au/xcart/home.php?cat=1735

Stay tuned for some Bella Blvd here is a sneak peak of a double layout I did of my daughters 10th Birthday using the Hello Beautiful Collection


The above layout is using the Hello Beautiful Collection along with some left overs from My Little Shoebox (banners) once again I have 3D lots of the shapes to give added dimension


Until next time Happy Scrappin
Cindy

Friday, January 21, 2011

Donna Salazar Layouts

Just a quick post to share a layout using the gorgeous Donna Salazar paper ranges that are available at Bumble Bee Crafts now.


And because I use these flowers all the time on my layouts, I thought I'd show you how quick and easy they are to make, so you can try for yourself if you haven't already :):):)

Take your favourite paper, in this case I have used Donna Salazar to match my layout. Take any flower punch you have in your stash, the size doesn't really matter too much.


Punch 5 flowers from the paper.


Pierce a hole in the centre of the 5 flowers using an awl or even just a regular metal skewer does the trick just as well.


Insert a brad to match your colour scheme. I adore these pearl brads and use them all the time as flower centres.


Close it off at the back to make it secure for scrunching and then you can open it again when you go to attach it to your project.


If using heavyweight cardstock, I always like to use some water to soften and it makes scrunching so much easier and the end result more rose like too.


Scrunch each layer and remember, you can't scrunch too much LOL.


The end result will resemble something like this, but all flowers in nature are different, so don't worry too much how different it appears.


This is a close up of how the flowers looked on a layout.


I hope you enjoyed these layouts and mini tutorial and I'll be back very shortly with some gorgeous Bo Bunny Surprises, so be sure to stay tuned for those, till next time, thanks for stopping by, Tiff :):):)

Tuesday, January 11, 2011

My Little Shoebox

Are you after COLOURFUL and FUN papers than My little Shoebox is for you..

There collections always have co-ordinating papers, stamps, chipboard alphas, cardstock stickers and not to mention there Sparkle Glaze Alphabets and mini alphabets..

Here is some My Little Shoebox Inspiration using the Summer Breeze Collection


Above is a simple easel card I have cut the banners out of the Summer Breeze Sun Kissed paper added some flowers, buttons and a word from the mini-alphas pack and you have yourselves a card

Another card with some pattern papers from the Summer Breeze Collection and Journalling box from the Cotton Fields Pattern paper and left of banners from the Sun Kissed pattern Paper


 Above is an Off The Page Project...I brought these embroidery hoops a few weeks back wanting to do a Christmas Decoration with them but when I saw this collection I like the bright cheery colours rather than Christmas..
I have built up all of the papers and embellishments on Calico...this make for a fun wall hanging


It's been along time since I have done a layout on a pattern piece of paper I generally stick to white and Kraft cardstock...These papers went well with my family photo's due to the variety of colours...

We would love to see some of your creations using My Little Shoebox if you would like to be featured on our blog then send pics of your creations to bumblebee.crafts@live.com.au

CHA is just around the corner and I am very envious of Trish and Trevor they are heading over to America to view all of the latest and greatest Scrapbooking/Cardmaking products... I can't wait to hear all about the new goodies that Bumble Bee will be stocking..

Check Out the Pre-Orders Section with the way the American Dollar is it's the perfect time to buy your Scrapbooking Products


There are NEW 3 Bugs, Karen Foster and Bella Blvd

Will be back with some MORE My little Shoe Box Simple Life and Cute as a Button....
Also some Bella Blvd

Sunday, January 9, 2011

A NEW YEAR...NEW BEGINNINGS

There have been alot of changes at Bumble Bee Crafts new and exciting ones....and what better way to kick of the new year than with some creative inspiration..

Donna Salazar is one of Bumble Bee's newest lines..

Here is a layout and a double tri-fold card using her Artistic Winter papers and her Weathered Winter range
These new paper ranges are PERFECT for the cardmaker and scrapbooker with her Artistic ranges you can get even more creative by adding water colours, chalks and even blending pens


To make the above card you will need
2 x 15cm x 30cm
2 x 15cm x 10cm
2x 15cm x 15cm

With the first 2 you have cut (15cm x30cm) you will need to score at 2" 4" 8" and 10"
then length ways cut 1 " in from the 2" up to the 10" then concentina fold) this may take a little bit of fiddling around to get it to sit right do this to both pieces of paper

The 2 pieces that are cut 15cm by 10cm are used to join the two that you have just folded ...
Place one on the top of the two that have been folded and one on the bottom this will join them to make one huge double tri fold card the centre will be able to hold a 6x4 photo

the last two pieces that have been cut 15 cm x15cm will be used for the front cover you will need to score them both at 2" and fold

These are then attached to the front of the double tri-fold card glue along the 2' fold and attach....the inside of the cover is big enough to put a 6x4 photo

Once it is all put together it's time to have some fun and DECORATE..

This is great for a card or even a mini-album.


The above layout is on Decorating my Christmas Tree and as per usual I have way to many photo's that I wanted to scrap so I ended up making the base of an exploding box to attach to my layout ( You will need a 12x12 piece of cardstock divide into 3"x3" squares you should have 3 rows or 3 once this is done cut out the 4 corners once this is done fold into a small sqaure...decorate and you are done)


Here are some more single Tri-fold cards and Double Tri-Fold Cards that I have done...the possibilities are endless with what you can do.  The papers I have used of the below cards are 3 Bugs Tool Time.


I hope that you have enjoyed our first post for the NEW year...There is going to be lots of inspiration, competitions and tutorials going on on this blogs this year we hope you have as much FUN creating as we do.

Tomorrow we will have some My Little Shoebox inspiration